Инструкция по настройке модуля ЮMoney для OpenCart 2/3
ЮMoney — это модуль для интеграции интернет-магазина с платёжными сервисами ЮMoney.
ЮKassa: позволяет принимать платежи на расчетный счет и делать возвраты (по договору, для юрлиц и ИП).
ЮMoney: позволяет принимать платежи на кошелёк ЮMoney (без заключения договора, для всех).
За техническую поддержку и обновление модуля отвечает компания «ЮMoney».
Установка модуля
- Скачайте архив с модулем.
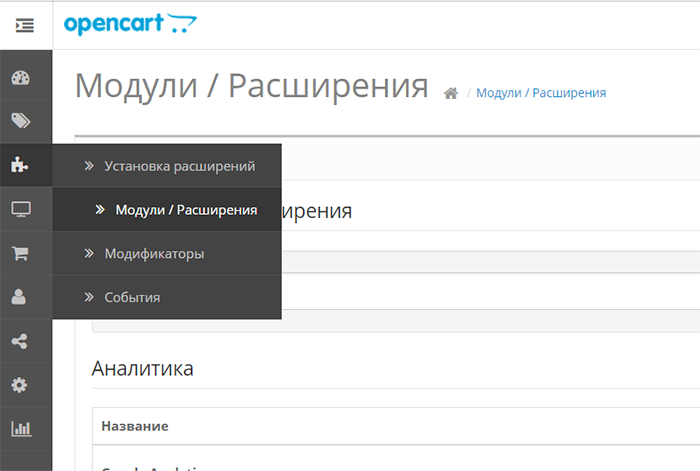
- В панели управления выберите пункт меню Модули — Установка расширений.
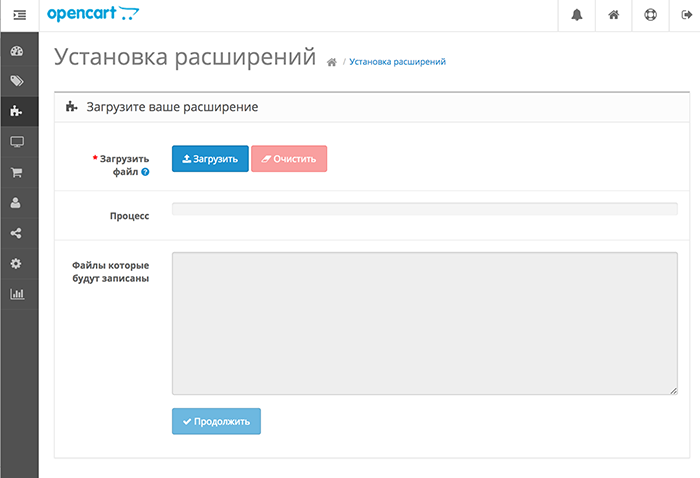
- Нажмите Загрузить и выберите скачанный архив. Когда архив загрузится, нажмите Продолжить.
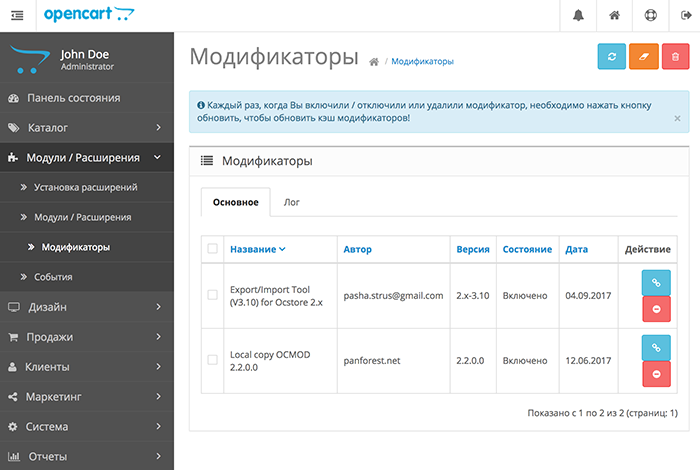
- В панели управления выберите Модули, затем — Модификаторы. Нажмите Обновить — голубой квадрат в правом верхнем углу. Дождитесь надписи «Действие успешно выполнено!».
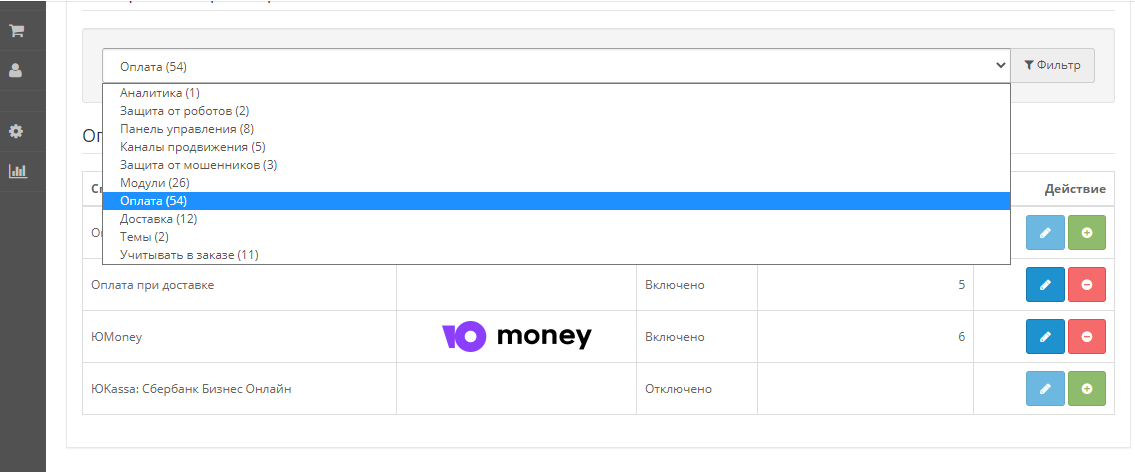
- В левом меню выберите Модули — Модули/Расширения. В разделе Тип расширения выберите Оплата. Откроется список платежных расширений. Найдите в нем ЮMoney и нажмите Активировать (зеленый квадрат справа).
- Когда появится надпись «Настройки успешно обновлены», можно переходить к настройке модуля.
Как обновить модуль до новой версии (2.3.0 и выше)
- Скачайте архив модуля. Выберите тот архив, номер которого соответствует версии OpenCart (проверить версию можно в кабинете администратора внизу страницы).
- Загрузите скачанный архив в раздел Модули/Расширения — Установка Расширений.
- В разделе Модули/Расширения зайдите в Модификаторы и нажмите Обновить.
ЮKassa
Как связать сайт на OpenCart с личным кабинетом ЮKassa
- Если магазин к модулю ещё не подключен, нажмите на Подключить магазин.
 Если магазин подключен и вы хотите его поменять или переподключить, нажмите Сменить магазин.
- Откроется всплывающее окно. Если не открылось, возможно, браузер его заблокировал — разрешите открывать всплывающие окна на этом сайте.
- Разрешите выдать доступ к ЮKassa.
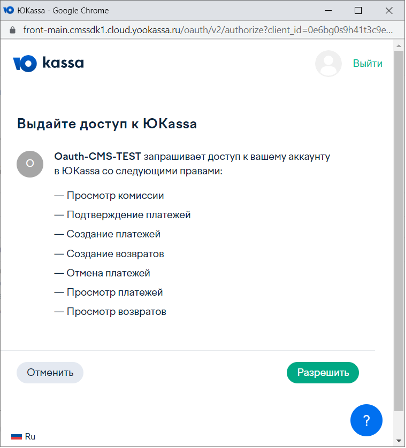
- Выберите магазин, который хотите подключить к модулю.
- Введите код из смс → всплывающее окно закроется и появятся данные по подключенному магазину.Если вышла ошибка, перезагрузите страницу и войдите в ЮKassa ещё раз.

Как настроить прием платежей
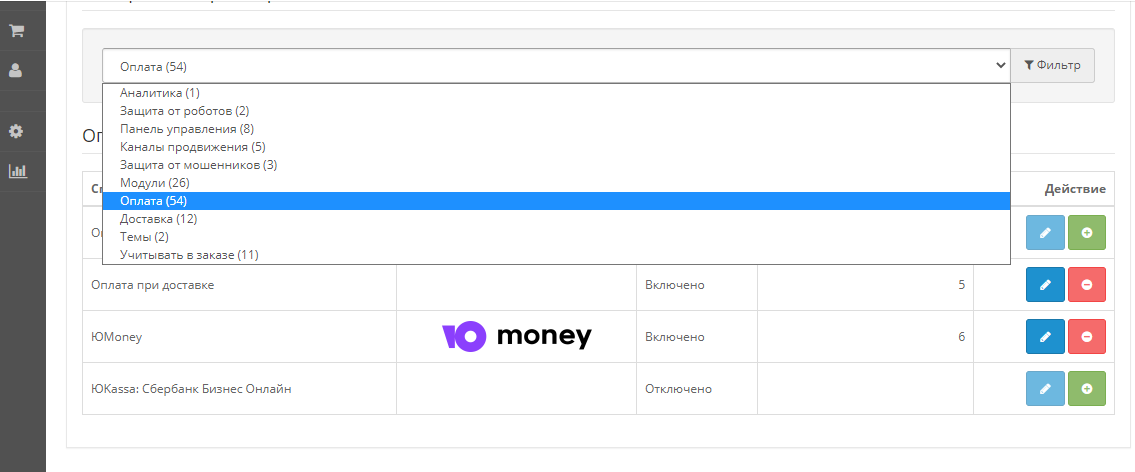
- В панели управления сайтом нажмите Модули — Модули/Расширения. В списке Выберите тип расширения поставьте «Оплата».
- Откроется список платежных расширений. Найдите в нем ЮMoney и нажмите «Редактировать» (синий квадрат с карандашиком справа).
- Откройте вкладку ЮKassa. Поставьте галочку Включить прием платежей через ЮKassa.
- Заполните поля ShopID и Секретный ключ: оба параметра можно взять в личном кабинете ЮKassa.
- В поле Название платежного сервиса напишите «ЮKassa (банковские карты, электронные деньги и др)».

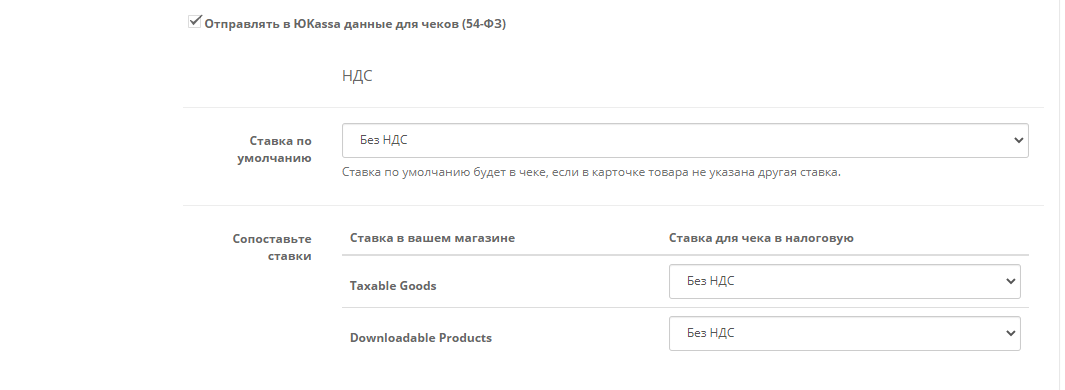
- Если вы настраивали отправку чеков в налоговую через партнеров ЮKassa (по 54-ФЗ), включите отправку данных для чека. Затем укажите, какую ставку НДС ставить в чеке.
- Ставка по умолчанию будет в чеке для товаров, у которых вы не указывали НДС раньше,
- Ставки, которые уже есть в вашем магазине, нужно сопоставить со ставками в ЮKassa.
- Чтобы фискальные документы соответствовали ФФД 1.05, настройте Признак способа расчёта и Признак предмета расчёта.
 Признак способа расчёта (способ расчёта) — это категория способа, которым вы принимаете оплату (оплата в кредит, предоплата, полный расчёт и т.д.)Признак предмета расчёта (предмет расчёта) — это категория товаров и услуг, которые вы продаёте (товар, услуга, ставка в игре и т.д.)В настройках модуля значения этих параметров задаются отдельно для товаров и для доставки.Второй чекКогда вы настроили всё для 54-ФЗ, можно перейти ко второму чеку. Если включить эту опцию, модуль будет формировать закрывающий чек. Это произойдёт автоматически, если в заказе есть позиции с полной предоплатой, и этот заказ перешёл в выбранный статус. Например, «Завершён».
 В истории заказа появится запись об отправке второго чека.
 - В поле «Статус заказа после оплаты» укажите статус, который будет присвоен заказу, который оплатили через ЮKassa.

- По желанию включите «Выставление счетов по электронной почте» и настройте шаблон письма. После этого сможете одной кнопкой отправлять счета на оплату заказов, которые сделаны на вашем сайте.Как настроить выставление счетовКак выставлять счета
- Когда закончите, прокрутите страницу наверх и нажмите Сохранить — синий квадрат с иконкой дискеты. Готово — можно проверять прием платежей.
Как делать возвраты платежей
- В левом меню выберите «Продажи», затем — «Заказы». В списке заказов найдите нужный (если список большой, используйте фильтр сверху).
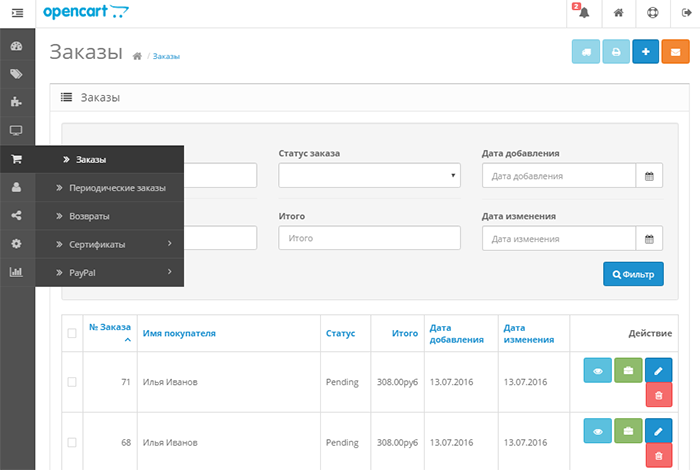
- В поле «Действия» (Action) в строчке с заказом кликните по зеленому значку «Управление заказом».

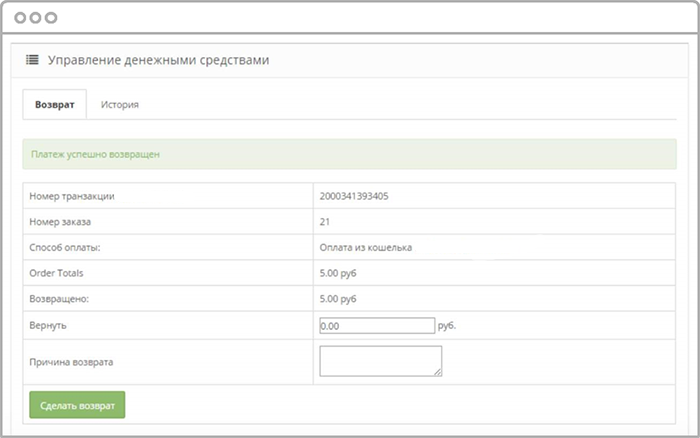
- Укажите сумму возврата. Напишите причину, по которой возвращаете деньги — это ваше сообщение для клиента.
- Нажмите «Сделать возврат». Если всё в порядке, вы увидите сообщение «Платеж успешно возвращен». Если возврат не прошел — сообщение об ошибке.
Как использовать отложенную оплату (предавторизацию)
Если включена отложенная оплата, платеж банковской картой проходит в два этапа:
- При оформлении заказа на сайте банк блокирует нужную сумму на карте клиента.
- Магазин подтверждает платеж или возвращает деньги клиенту.
В таком случае, если заказ отменится или товара не будет в наличии, магазин сможет легко вернуть деньги. Комиссии за такой возврат нет.
Как включить холдирование
- Перейдите в раздел Модули / Расширения.
- Выберите в выпадающем списке тип расширения «Оплата».
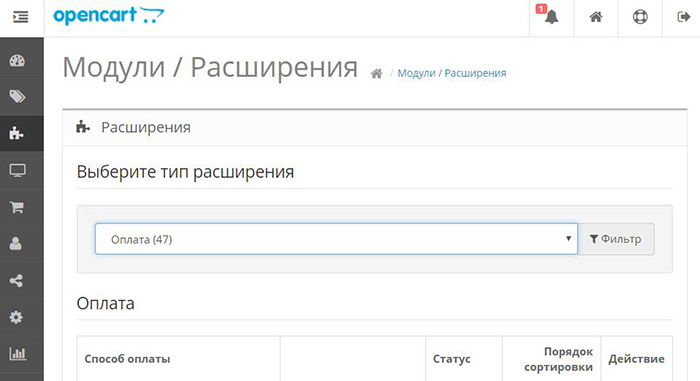
- В списке расширений найдите модуль ЮMoney и нажмите кнопку «Редактировать».

- Откроются настройки модуля. Здесь нужно установить галочку напротив пункта «Включить отложенную оплату», чтобы включить функцию.Когда функция включена, у заказов появляются новые статусы: «Ожидает подтверждения» и «Отменён». Статусы нужно настроить в форме, которая появится после включения отложенной оплаты.Потом не забудьте сохранить настройки.

Как подтвердить или отменить платёж
- Перейдите в раздел Заказы.
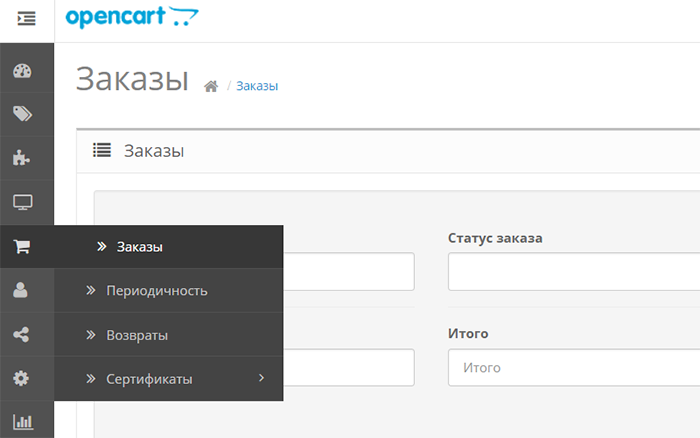
- В списке заказов найдите тот, который ожидает подтверждения. У него будет кнопка «Подтверждение платежа». Нажмите её, чтобы перейти в форму подтверждения или отмены платежа.
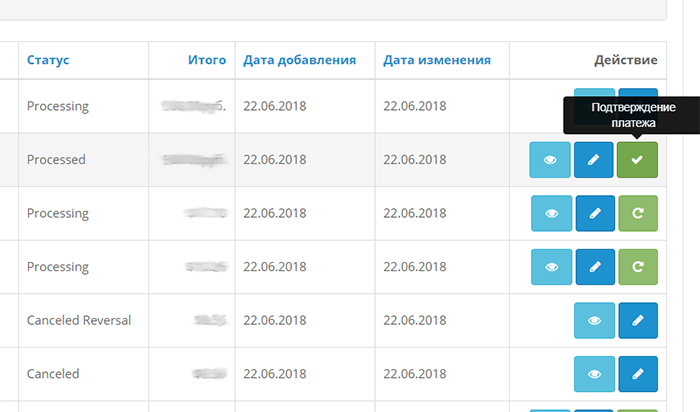
- В этой форме отображается основная информация о платеже. Есть две кнопки: «Подтвердить платёж» и «Отменить платёж».Для подтверждения платежа нажмите «Подтвердить платёж».Чтобы отменить платёж, нажмите кнопку «Отменить платёж».Действие происходит сразу после нажатия кнопки.
Как настроить B2B-платежи
B2B-платежи в ЮKassa позволяют принимать на сайте оплату от юридических лиц.
- После установки модуля ЮKassa найдите в списке платёжных модулей «ЮKassa: Сбербанк Бизнес Онлайн», и убедитесь, что он активирован. Если нет — нажмите кнопку «Активировать».

- Чтобы B2B-платежи через Сбербанк Бизнес Онлайн работали, включите эту опцию в настройках модуля:

- Укажите налоговую ставку, которая будет передаваться в Сбербанк Бизнес Онлайн, если в карточке товара не указана другая ставка.
 Внимание. При оплате через Сбербанк Бизнес Онлайн есть ограничение: в одном заказе могут быть только товары с одинаковой ставкой НДС. Если клиент положит в корзину товары с разными ставками — мы покажем ему сообщение, что оплатить их одним чеком не получится.
 - Сопоставьте ставки НДС в вашем магазине со ставками, которые будут передаваться в Сбербанк Бизнес Онлайн.

- После настройки B2B-платежей не забудьте сохранить изменения.При оплате через Сбербанк Бизнес Онлайн информация о плательщике записывается в историю заказа.
«Покупки в кредит» от СберБанка
В этот способ оплаты входит кредит и рассрочка. Если покупатель платит в рассрочку, в модуле может отображаться неверная сумма покупки (верная будет в личном кабинете ЮKassa). На покупателя это никак не повлияет — он всегда оплатит верную сумму.
Ниже объясняем подробнее, почему так происходит — в двух разных случаях.
Если в заказе не применяется одновременно налог и доставка
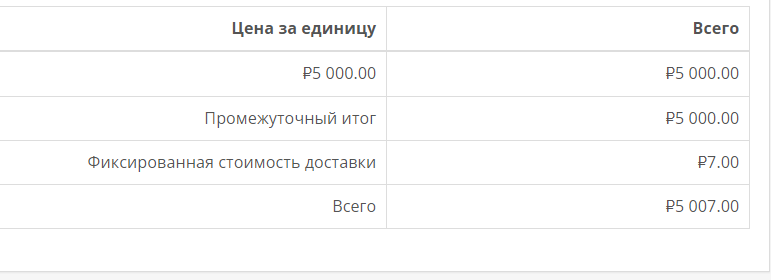
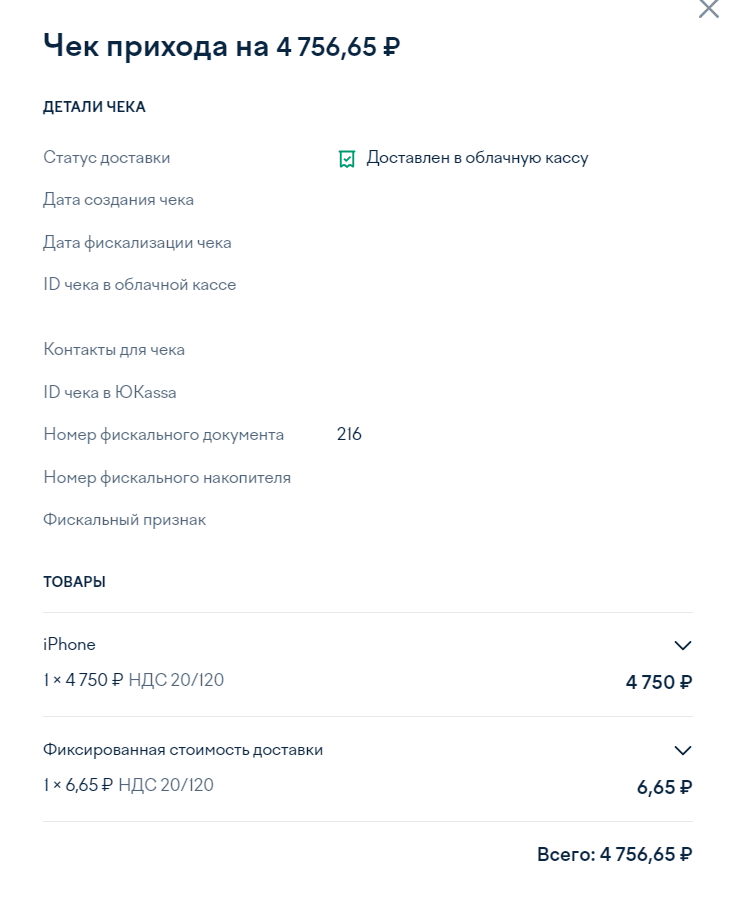
Когда вы получите уведомление от ЮKassa о том, что статус платежа изменился на «Успешно» — модуль пересчитает общую сумму заказа и стоимость каждой позиции в заказе, чтобы они соответствовали значениям в чеке в личном кабинете ЮKassa.
Заказ для покупателя перед оплатой:
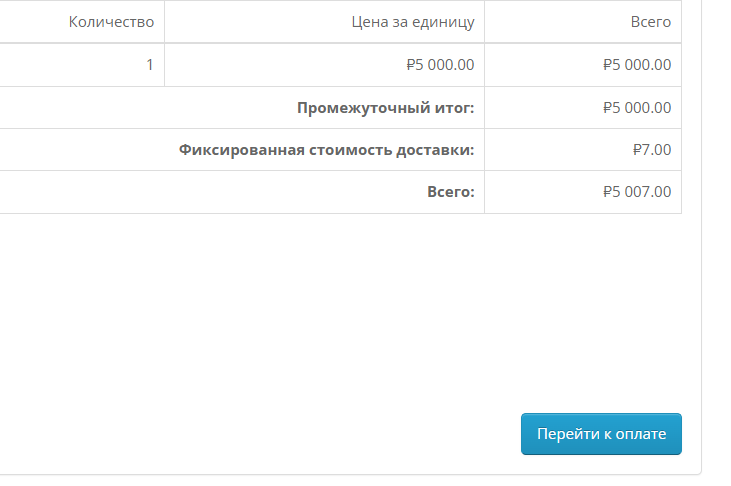
Заказ в модуле до перерасчёта:
Чек в личном кабинете ЮKassa после оплаты:
Заказ в модуле после пересчёта. В истории указана скидка:

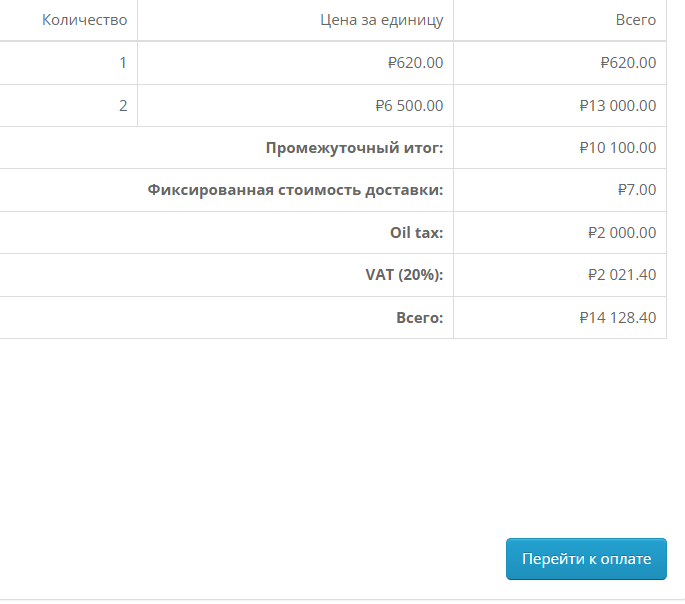
Если применяется и налог, и доставка
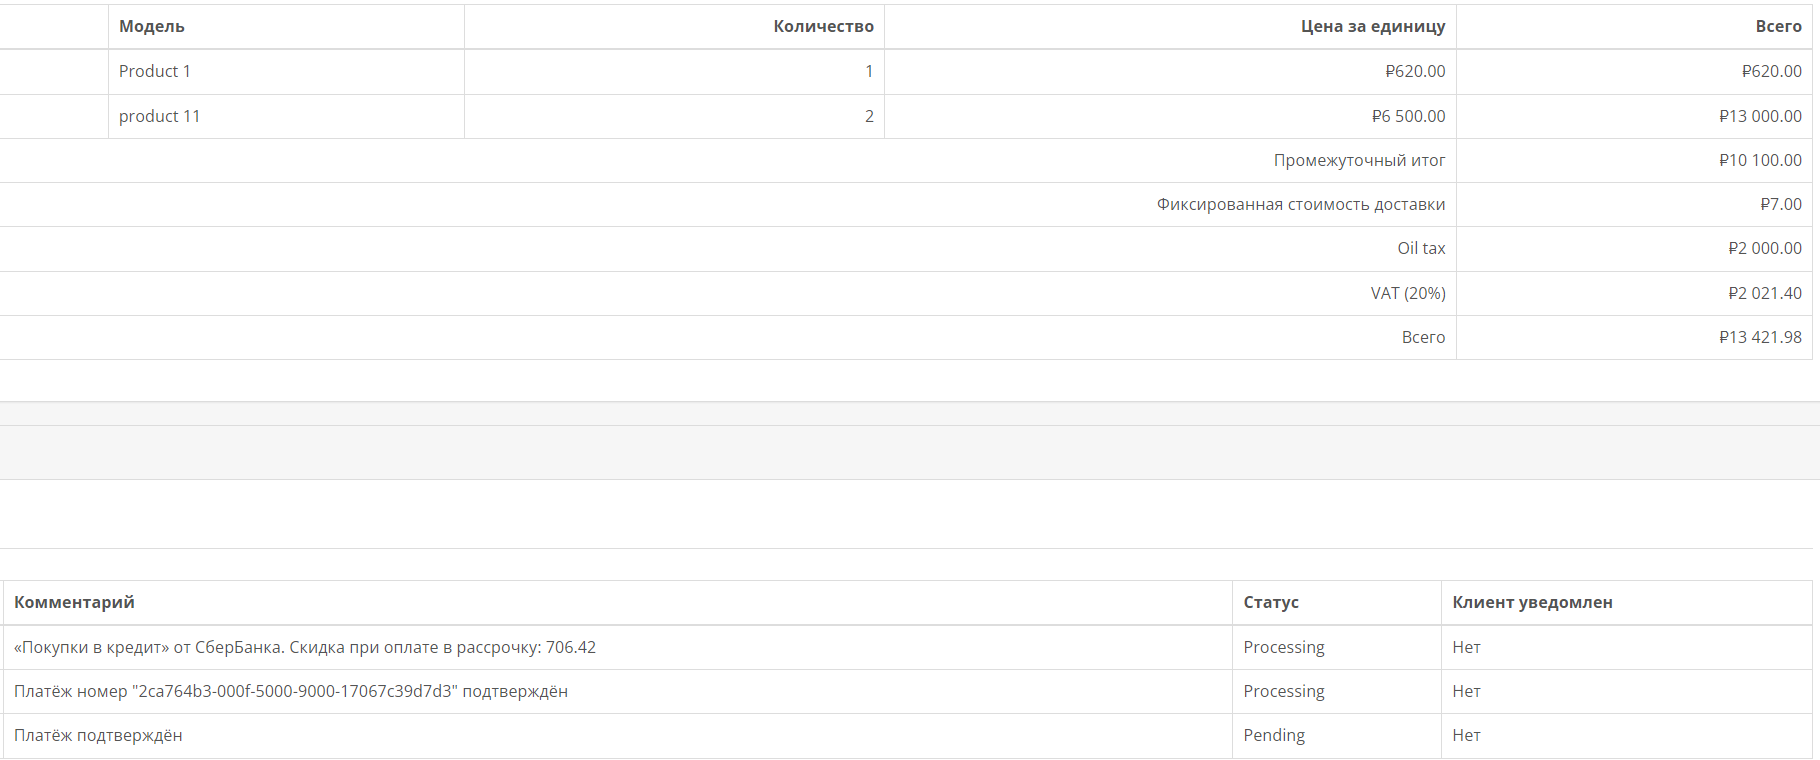
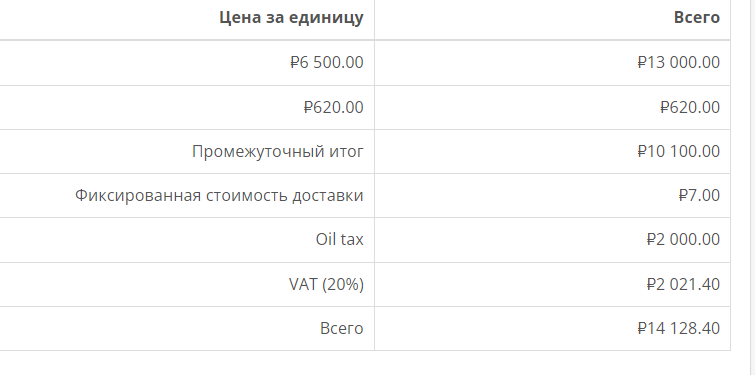
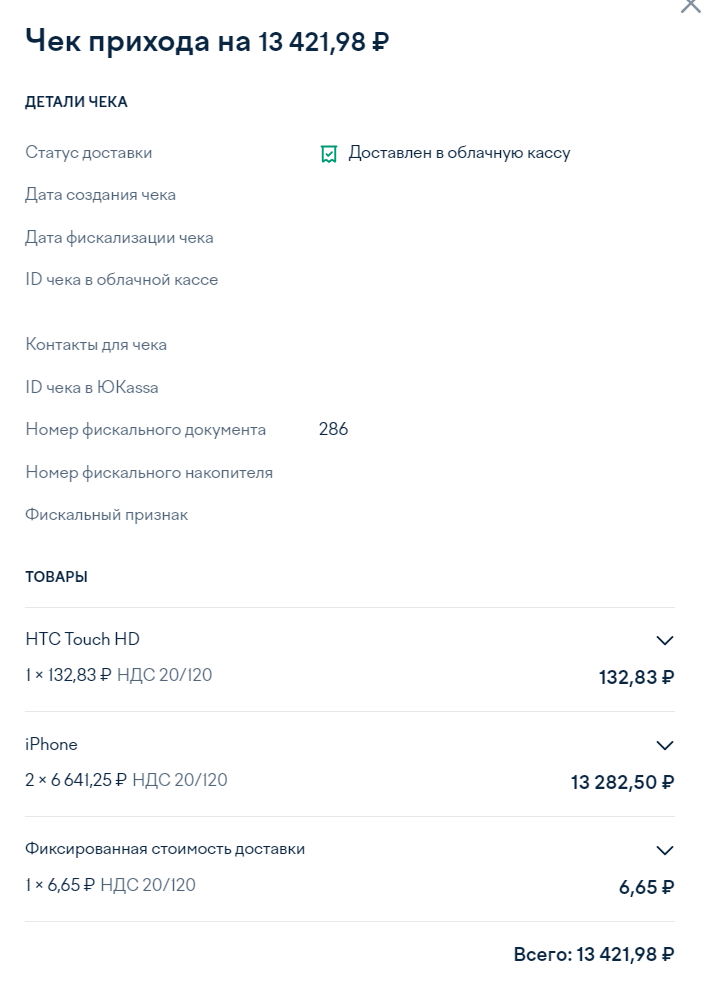
В заказе пересчитается только итоговая сумма заказа. Так происходит потому, что OpenCart показывает налоги отдельно от товаров, а в чеке в личном кабинете ЮKassa цены отображаются вместе с налогами. Также может возникнуть неточность, когда данные для чека отправляются из модуля: доставка указывается без налогов, затем ЮKassa формирует чек по этим данным, а модуль отображает в админке другую стоимость.
Заказ для покупателя перед оплатой:
Заказ в модуле до пересчёта:
Чек в личном кабинете ЮKassa после оплаты:
Заказ в модуле после пересчёта:
